Monday, July 19, 2010

Rayon Wrap Skirt "How To"

First get nice rayon the kind that is almost scratchy feeling but not quite. It dries quickly and doesn't wrinkle. I use mine as a just about everything skirt including my swim suit cover up!
Take your waist measurement at the place you like to have it lay (I like mine below my actual waist) but only from side around the back to the other side. Now measure the same way only around the front. If they are the same measurement just keep one number. The back measurement is what we will use for the first piece. Mine was 17" and you add 1" for the seam allowance (1/2" for each side). If you use different seam allowance add 2 to your back number. Then I measured where I like my skirts to fall (above my knee) 19" plus 1/2" for the hem. On the fold of the fabric cut straight across the top 1/2 the measurement for the back plus the seam allowance (Mine was 17" + 1" divided by 2 = 9")so I cut 9" across the top. For the bottom measure straight down the length that you like (mine is 19") and make a mark now cut across the length of the original back number (Mine was 17") and cut length-wise across the fabric. Now cut diagonally from the end of the waist cut and the end of the length cut.

For the 2 front panels (if you are the same front and back) take the back panel open it, lay it on top of the uncut fabric folded so you have 2 layers. Lay it so that 2 inches of the back fabric are folded under from the waist down making a straight edge now cut it.

Now my daughter's front is bigger than the back and I didn't allow for it and screwed this up! If you are a couple of inches off allow for a bigger front so that when you measure you are 2 inches + seam allowance from the side of your waist. Example if my front was bigger than my back I would not fold the back over 2 inches I would adjust it so that there was only 2 inches from the edge of my side. Say my front is 19" and my back is 17" I would only fold the back 1" and cut (not the 2" called for.)
Now right sides together sew the 2 curved pieces to the sides of the back piece. This should give you one long piece with the edges straight not curved. Now sew a hem up the sides of the edges.


Now sew on the fold over elastic or bias (be with bias tape and don't stretch it. Start with 10" of bias just sewn so that it stays together then sew it over the entire top edge of the skirt and end with 10" of bias after the end of the fabric.


Now sew 2 pieces of foe or bias 10" each and then pin 1 to each side the wrong way away from the edge and sew it.

Now bend it back the right way and sew it towards the front edge and sew it. This should cover the yucky edge.

Hem it and you are ready to wear your wrap!

If you have questions or need additional pictures, dimensions or info email me! I am new to blogging and this is a bit harder then the hands on teaching.

Rayon Wrap Skirt

This is my favorite kind of skirt and it took me about an hour to make! "How To"

This is why I prefer not to be the one in the pictures! I am Casper white and I always have a goofy look on face.
I made one on Saturday and had to make some adjustments!I made it with a non-stretch bias tape at the waist and it made it too big and pucker. I also made it too big in the waist. I like to wear my clothes a little lower than my belly button so I make them a little larger than my waist measurement, then I get crazy and add way too much! I guess in my head I am way bigger than the fabric says I am.

This just doesn't fit quite right. The bias tape has no give but the fabric does. I think I pulled the bias to get it straight and it kept the rayon fabric from going back into shape. Lesson learned. The one I am pictured wearing I used FOE (fold over elastic) and it is perfect!!

Monday, June 28, 2010

1953 Vogue Special Design S-4324 Pattern Give Away!


Rules: Monday evenings I will post a pattern for the giveaway. You have to follow my blog and leave a comment. I will do the random number thing on Sunday evenings. I am going to do this the entire summer and you can win more than once so leave a comment every week.

This pattern is size 16 with 34 bust and hip 37.

Sunday, June 27, 2010

For my sister!!!

I hit the mother load of finds! A 70's pattern:-)


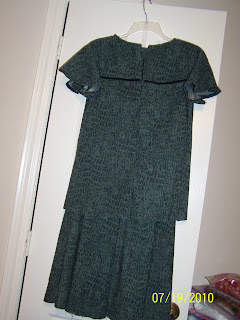
This is the fabric I am making the skirt and blouse out of. It is actually a kind of stretchy medium weight fabric. My sister loves green and this is perfect. Tonight I finished all but the hem on the skirt. I even put a zipper in for the first time. It was all very easy. This pattern is a dream. I hope the top goes together tomorrow as easily. I will post pictures of her in it when it is finished.

Tuesday, June 22, 2010

Fleece in the Summer! Sewing NOT wearing:-)


Fleece is always on sale in the hot months where I live. If you find it 50-60% off and have the extra 10% at the fabric store, buy lots of it! I plan to start my Christmas sewing early this year! Well, that is the plan. I made this little hooded cape for dd a few winters ago.


This pattern is about the easiest I have made. It is perfect for beginners and fleece fabric is very forgiving. This looks great like you put a lot of work into it. Indietutes also has a great blog about a hat with long ears. It is awesome in fleece with a flannel ears!


This year for dd's preschool class Christmas gifts I think I will make a dozen of them. 1 for each kid. They are really cool and would be very cute in winter fabric. The ears tie up in knots, they can just hang or they can be tied under the neck to keep the ears warm and the hat from flying off in the wind.

Sunday, June 20, 2010

Fresh Tomato Basil Pizza


This is about the easiest pizza to make and takes about 15 minutes to cook. We usually have pizza a couple of times a month, but our favorite place on the corner went out of business! First pick fresh tomatoes and basil. I have Italian basil growing (behind her) and Thai basil that she is holding. I love the Thai basil as it doesn't have the minty flavor that Italian basil has AND it has purple flowers:-) That may be the real reason but it just smells so good when the wind blows that I have a couple of really big plants.


I always have some baked chicken so I used that, too.
In a 9x13 pan I rolled out some pie crust (it is flakier on thin crust pizza), with the back of a spoon smooth out about 1/2 cup of tomato sauce. On top of that spread out 2 cups of cubed baked chicken. Now, you layer on the cheese. On top of the cheese single layer fresh sliced tomatoes and sprinkle with finely chopped basil. Bake for 12-15 minutes and serve hot!
Sorry about the picture. I made 2 pans of it thinking I would have a great picture with the second one once the steam quit rising, but my son liked it A LOT more than I thought he would.

Friday, June 18, 2010

It's So Easy It's Simplicity 3853


This pattern is great and has a lot of variations that really look cute. If you make the waist with enough stretch it will last the next summer as capris. I have had a million complements and have given a few as gifts. This always gets rave reviews at parties.


This version is exactly like the pattern with dangly trim at the chest, bottom of the top and the bottom of the pants. It is very easy to make.


This version: cut the pattern at the line for adding the trim. Cut the top fabric with 3/8" seam allowance and the cut the bottom part with the same seam allowance. Sew them together at the trim line using your 3/8" seam allowance. Sew the outfit now just as the pattern instructs. I also used trim at the chest, bottom of the top and the bottom of the pants. I would definitely recommend this for a new sewist.